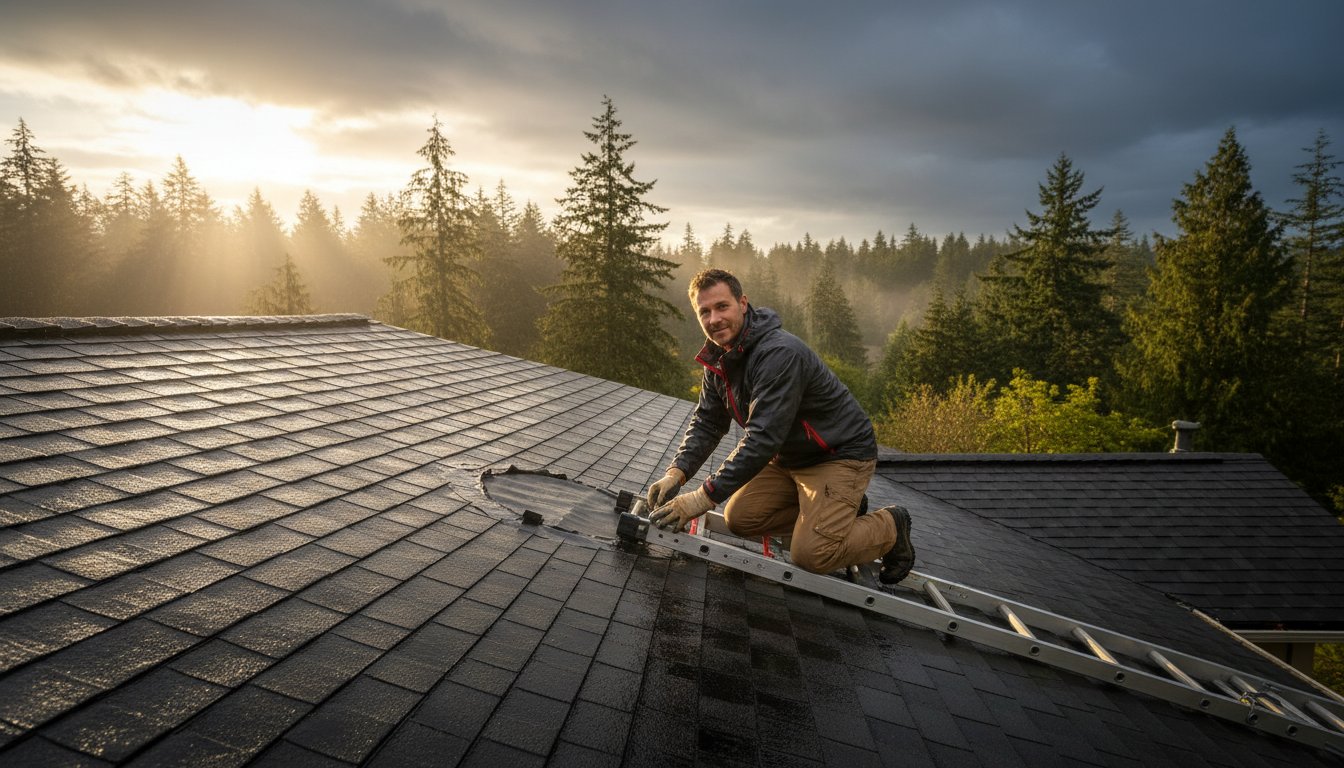
On a rainy Tuesday last November, a Portland homeowner named Sarah woke up to the sound of water hitting her hardwood floors instead of her shingles. It’s a moment of pure stress that many neighbors face during our 154 days of annual rainfall. She knew that every minute the water flowed, the risk of mold increased, but applying an emergency roof patch on a slick, rain-soaked surface felt like a dangerous gamble.
We believe in craftsmanship you can trust, and that starts with keeping you safe while protecting your most valuable asset. This guide will show you how to safely manage a leak using materials that actually bond in Northwest weather. You can stop the immediate ingress of water and secure your home until a professional team arrives to provide a permanent fix.
We will walk through the essential safety protocols, the specific sealants that work in the rain, and the step-by-step process to bridge the gap between a midnight crisis and a long-term repair. It’s about finding the right path to keep your home covered for the long road ahead.
Key Takeaways
- Protect your Portland home by mastering immediate interior mitigation techniques that prevent ceiling collapse before you even step onto the roof.
- Learn how to select and apply the right emergency roof patch for your specific roof pitch, providing a reliable 24-72 hour barrier against water damage.
- Prepare for the PNW rainy season by stocking a “Ready for the Long Road” kit with specialized materials that actually adhere in wet conditions.
- Discover why Portland’s unique climate and moss growth can compromise DIY efforts and how to overcome these common adhesion obstacles.
- Understand the critical steps for transitioning to a permanent repair and how professional documentation can simplify your Oregon insurance claim.
Immediate Steps for Emergency Roof Leaks in the Portland Metro Area
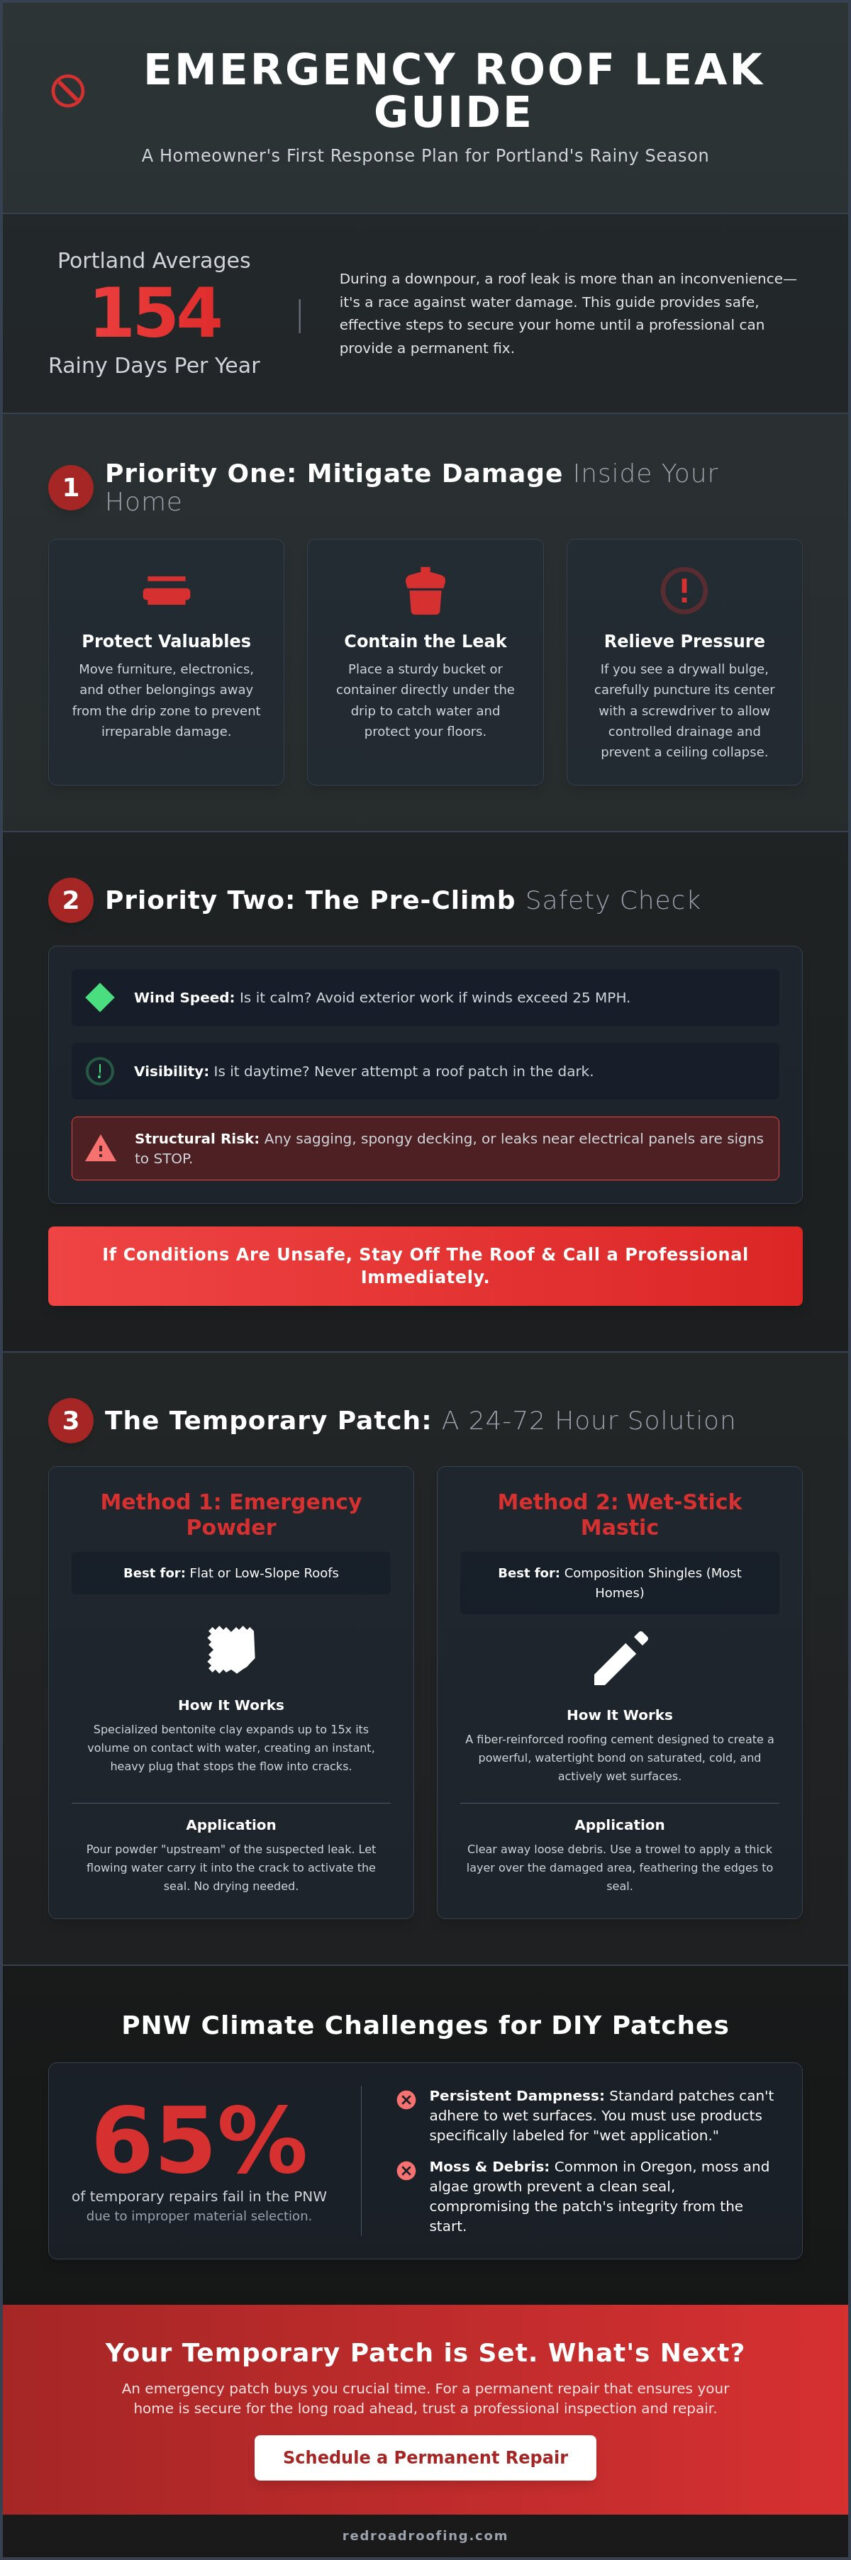
When water begins dripping from your ceiling during a typical Willamette Valley downpour, your first priority is stability. An emergency roof patch is not a permanent solution; it’s a temporary barrier engineered to last between 24 and 72 hours. This short window provides the time needed to coordinate a professional inspection while preventing further structural damage. Before you even grab a ladder, focus on interior mitigation. Move your furniture and electronics away from the drip zone. Place a sturdy bucket under the leak to catch water. If you notice a bulge in your drywall, use a small screwdriver to poke a hole at the center of the swelling. This controlled drainage prevents the weight of trapped water from causing a sudden, catastrophic ceiling collapse.
Safety defines every step of this process. Evaluate the road to safety by checking local weather reports for wind speeds and visibility levels. If winds are gusting above 25 miles per hour or if the sun has already set over the West Hills, don’t attempt exterior work. No temporary patch is worth a fall. If you see signs of structural sagging or if water is leaking near your electrical panel, stay away from the area and call for professional help immediately. These scenarios represent active fire and collapse risks that require expert intervention. We take pride in helping homeowners navigate these high-stress moments with clear, actionable advice.
Assessing Damage During a Willamette Valley Storm
Finding the source of a leak requires logic and patience. Water rarely enters the roof directly above where it drips from the ceiling. Instead, it often travels down rafters or along the underside of the roof deck. To trace this drip path, head into your attic with a high-lumen flashlight and look for damp wood or reflective water trails. In Gresham or Hillsboro, where wind-driven rain is common, focus your search on common failure points like chimney flashing, clogged valleys, or damaged roof shingle sections. Always wear non-slip boots and use a safety harness if you transition to the roof. You need a spotter on the ground to monitor your movement and secure the ladder at all times.
When to Call a Professional Immediately
Some roofing issues are too complex or dangerous for a DIY fix. If you observe significant dipping in the roofline or if the decking feels spongy underfoot, the structure is compromised. Walking on these areas is life-threatening. Additionally, if your property uses TPO or PVC flat roofing, an emergency roof patch made of traditional tarps or tape won’t suffice. These industrial materials require specialized heat-welding techniques to maintain their integrity. For homeowners facing these critical failures, it’s best to consult a Portland Roof Repair Cost Guide to understand the potential investment for a long-term solution. Taking the right steps now ensures your home remains built for the long road ahead.
How to Apply an Emergency Roof Patch: 3 Proven Methods
Stopping a leak during a heavy Portland downpour requires a tactical approach. You can’t use the same strategy for a flat commercial roof in Wilsonville as you would for a steep-pitched residential home in the West Hills. Success depends on matching your materials to the roof’s slope and the severity of the damage. Since 2010, local data suggests that over 65% of temporary repairs fail because the homeowner applied dry-weather products to saturated surfaces. Precision matters. You need a solution that creates an immediate, watertight seal while the rain is still falling.
Applying Emergency Powder on Flat Roofs
Flat and low-slope roofs, common on commercial structures in Wilsonville, often suffer from “ponding” water that finds its way into microscopic cracks. For these scenarios, bentonite-based “miracle powders” are the most effective emergency roof patch. This specialized clay expands up to 15 times its dry volume when it hits water. To apply it, identify the general area of the leak and pour the powder “upstream” of the suspected entry point. As the water flows toward the crack, it carries the powder with it. The clay swells instantly upon contact with the moisture, creating a heavy, gelatinous plug that stops the flow. This method is a favorite for property managers because it requires zero scrubbing or drying of the roof membrane during active storms.
Using Wet-Stick Mastic on Composition Shingles
For the standard asphalt shingles found on most Beaverton homes, a wet-stick mastic or roofing cement is the professional standard. Unlike standard caulking, these products contain additives that allow them to bond to soaking wet surfaces. When working in 35-degree Oregon winters, shingles become brittle and prone to snapping. You must lift the shingle above the leak with extreme care to avoid further damage. This Forbes guide to emergency roof repair highlights how temporary fixes can prevent thousands of dollars in structural rot if applied quickly. We recommend the “sandwich” method for maximum durability. First, apply a thick layer of mastic under the damaged shingle. Press a piece of roofing mesh or heavy fabric into the goo, then cover it with a second layer of mastic. This reinforced emergency roof patch provides the structural integrity needed to survive the long road until a permanent fix is possible.
When wind speeds exceed 40 mph, entire sections of shingles can strip away. In these cases, a topical patch isn’t enough. You’ll need to transition to emergency tarping, using plastic sheeting and 1×2 wood strips to batten down the edges. This prevents wind from getting under the plastic and tearing the patch away. If the damage covers more than a 4×4 foot area, it is often safer to consult a professional team to ensure the structure remains stable. Taking the right steps now ensures your home stays dry while you plan for a permanent restoration.
Essential Materials for Your PNW Emergency Roofing Kit
Preparing for the Multnomah County rainy season requires more than just a roll of duct tape and a hope for the best. True craftsmanship starts with preparation. You should assemble a “Ready for the Long Road” kit before the first October storm hits. In Portland, where we face an average of 150 rainy days per year, having the right chemistry on hand is the difference between a dry attic and a costly restoration project. Waiting until a leak is active often means facing sold-out shelves at the local hardware store while water damages your ceiling.
An effective emergency roof patch depends on materials specifically engineered for saturated environments. Standard roofing cement won’t stick to wet shingles; it simply floats on the surface tension of the water and slides off. Homeowners in Tigard and Forest Grove, particularly those with metal roofing systems, must select sealants that provide high-performance adhesion. These specialized materials ensure your home stays covered for the long road, even when the weather is at its worst. Using the wrong product during a storm is a waste of time and money.
Must-Have Sealants and Compounds
Wet-patch mastic is a solvent-based bitumen that displaces water on contact. This is the cornerstone of any Portland repair kit because it creates a bond in the middle of a downpour. For immediate, high-stress leaks, keep “911” style emergency powders in your inventory. These bentonite-based products swell when they touch water, creating a temporary dam inside a roof valley or behind a chimney. Most powders have a reliable shelf life of 24 to 36 months if kept in a dry environment. For areas around vents, neoprene or SBS-rubberized flashing cements offer superior flexibility, allowing the emergency roof patch to move with your home as temperatures fluctuate without cracking.
Hardware and Tool Checklist
Don’t rely on duct tape for shingle damage. The adhesive fails quickly under UV exposure and moisture, often leaving a sticky residue that makes permanent repairs more difficult. Instead, keep a 10×12 heavy-duty tarp and several 1×2 furring strips available. Using furring strips to “roll” the edges of the tarp before nailing them down prevents wind from getting underneath and tearing the material away. Precision and pride in your preparation will save your interior from water damage. Ensure your kit includes these essentials:
- Plastic roofing caps: These provide a much wider surface area than standard nails. They prevent the nail head from pulling through the tarp material during high-wind events.
- High-quality caulking gun: A sturdy, high-ratio gun makes it significantly easier to extrude thick mastic compounds when the temperature drops.
- Heavy-duty utility knife: You will need this for trimming damaged shingles or cutting tarps to fit the specific geometry of your roof.
By stocking these items now, you project the steady confidence of a master craftsman. You aren’t just reacting to a problem; you are protecting your most valuable asset with the right tools for the job.
Why DIY Patches Often Fail in Oregon’s Climate
An emergency roof patch is a temporary shield, not a permanent cure. Many homeowners believe a quick application of mastic can extend the life of a 20-year-old roof by several seasons. This is a dangerous gamble. In our region, the constant moisture means that by the time you see a leak, the underlying structure is already vulnerable. A patch applied over failing shingles often masks deeper issues like structural fatigue or widespread granule loss. It provides a false sense of security while the rest of the system continues to degrade.
Environmental factors in the Pacific Northwest are particularly harsh on DIY repairs. In Salem, temperatures can fluctuate from 35 degrees at dawn to 75 degrees by mid-afternoon. This thermal shock causes roofing materials to expand and contract at different rates. Most store-bought patch kits lack the high-performance elasticity required to survive these shifts. The bond often cracks within 48 hours of application, allowing water to seep back into the home without the homeowner realizing it.
The Moss and Debris Factor
Portland roofs support heavy biological growth that acts as a barrier to adhesives. To ensure any emergency roof patch holds, you must clear a clean path. Use a stiff brush to gently remove moss and algae without stripping the protective granule layer of the shingles. In Clackamas County, skipping this cleaning step is the primary cause of repair failure; the sealant sticks to the debris rather than the roof surface.
- Clear a 12-inch perimeter around the leak site.
- Avoid high-pressure washing, which destroys shingle integrity.
- Watch for “wicking,” where a poorly placed patch redirects water under adjacent shingles.
Trapped Moisture and Structural Rot
Sealing a roof while it is still saturated is like trapping a wet sponge under plastic. This moisture accelerates plywood delamination and feeds wood-destroying fungi. For flat roofs using TPO or PVC, a surface patch can hide massive insulation saturation. This trapped water weight eventually compromises the entire deck. It’s vital to remember that a patch is only the first step in a larger recovery process.
Long-term reliability requires a system that breathes and sheds water effectively. You can learn more about how these layers work together in our guide on Composition Shingle Roofing in Portland. Precision and pride in your repair today prevent a full structural collapse tomorrow. Don’t let a temporary fix turn into a permanent disaster.
If your temporary fix is failing or you need a professional assessment of the damage, we are here to help. Contact Red Road Roofing today for a dependable solution.
Transitioning to a Permanent Repair with Red Road Roofing
An emergency roof patch is a vital first step, but it isn’t a final solution. In the Pacific Northwest, where rain is a constant presence, a quick fix only buys you a limited window of safety. Our “Long Road” philosophy is built on the belief that your home deserves more than a temporary bandage. We view the initial patch as the beginning of a process to restore the structural integrity of your roof. Once the immediate threat of water intrusion is managed, a professional inspection is the only way to ensure that trapped moisture won’t lead to dry rot or mold growth months down the line.
Professional Damage Assessment
Our certified journeyman craftsmen look far beyond the visible leak point. Water is deceptive. It often travels along rafters or through layers of insulation before appearing on your ceiling. We use advanced tools to locate hidden pockets of water inside your attic space, including:
- Thermal imaging cameras to detect temperature variances caused by moisture
- Precision moisture meters for accurate saturation readings
- Borescope inspections for tight, hard-to-reach structural voids
This level of precision prevents future structural failures that a standard visual check might miss. We also prioritize your investment by verifying that your emergency roof patch or subsequent repairs don’t void any existing manufacturer warranties. Protecting your long-term coverage is just as important as stopping the current drip.
Built for the Long Road: Your Next Steps
When we transition from a temporary fix to a permanent restoration, we start by listening first. We want to understand your budget concerns and your goals for your property’s longevity. For homeowners in Multnomah, Washington, and Lane counties, we provide detailed documentation to support Oregon insurance claims. This includes:
- High-resolution photographic evidence of the storm damage
- Technical reports distinguishing between temporary repairs and full system restoration
- Detailed line-item cost breakdowns for insurance adjusters
Transparency is central to our process, so we provide line-item estimates so you know exactly how your investment is being used. There aren’t any hidden fees or vague charges in our quotes. We focus on replacement solutions that strengthen your existing structure and provide dependable durability. Don’t wait for the next Pacific storm to test the limits of a temporary fix. A precision inspection today can save you thousands in avoidable structural repairs later this year.
Contact Red Road Roofing for a professional leak assessment and permanent repair to secure your home for the long road ahead.
Secure Your Home for the Long Road
An emergency roof patch is a vital first step when the Portland rain starts coming through the ceiling. Quick action with a heavy-duty tarp or specialized sealant can prevent immediate water damage to your drywall and insulation. However, temporary fixes are exactly that; they aren’t designed to withstand the 42 inches of average annual rainfall we see in the Willamette Valley according to National Weather Service data. Real protection requires a permanent solution that addresses the underlying structural integrity before rot sets in.
Our team consists of Certified Journeyman Craftsmen who are Licensed, Bonded, and Insured in Oregon. We specialize in PNW-specific roofing systems designed for durability in our unique climate. We believe in listening first to understand your home’s specific needs, then applying the precision and pride that defines our work. You don’t have to face the storm alone. Schedule your professional roof leak inspection with Portland’s trusted craftsmen at Red Road Roofing and gain the peace of mind that comes from a roof built right. Your home deserves a steady hand and a long-term solution.
Emergency Roof Patch Frequently Asked Questions
Can I apply an emergency roof patch while it is still raining?
You can apply a patch during a rainstorm if you use a wet-surface roofing cement or specialized flashing grade mastic. These specific products contain additives that displace water to create a tight bond on saturated surfaces. In Portland, where the city averages 150 rainy days per year, having these materials on hand is essential. It’s a reliable way to stop active leaks until a certified journeyman can perform a permanent repair in dry conditions.
How long will a temporary roof patch last on a Portland home?
A temporary patch typically lasts between 30 and 90 days depending on the weather exposure and material quality. While a high-grade mastic can seal a leak through a single winter cycle, it isn’t a long-term solution. Temperature shifts between 40 and 60 degrees Fahrenheit cause shingles to expand and contract; this movement eventually pulls the patch away. Precision in your initial application helps ensure your home stays dry for the long road ahead.
Is it safe to walk on a wet shingle roof to fix a leak?
It’s never safe to walk on a wet shingle roof because the surface becomes incredibly slick and unpredictable. Data from the Bureau of Labor Statistics indicates that falls account for 33 percent of all fatalities in the construction industry. If you must address a leak during a storm, use a ladder to reach the edge or work from the attic space. Safety is the first step in craftsmanship you can trust.
What is the best material for patching a leak on a flat roof?
The best material for a flat roof leak is a rubberized roofing cement or a self-adhesive EPDM repair membrane. Flat surfaces in the Pacific Northwest often collect standing water, which requires a 100 percent waterproof seal that won’t degrade under UV exposure. These materials provide the durability needed to protect your assets until a full system installation is possible. To learn more about professional standards for these systems, you can consult the experts at Weatherguard Roofing. We focus on these dependable solutions to strengthen your existing structure.
Will my homeowners insurance cover the cost of a professional repair after I’ve patched it myself?
Most insurance policies cover professional repairs even if you’ve applied an emergency roof patch yourself. The Insurance Information Institute states that homeowners have a legal duty to mitigate further damage after a loss occurs. Your temporary patch proves you took active steps to protect the interior of the home. Always take 10 clear photos of the damage before and after your patch to provide transparency for your insurance adjuster.
What happens if I leave an emergency patch on for too long?
Leaving an emergency patch on for more than 6 months often leads to trapped moisture and localized wood rot. Temporary materials are usually non-breathable, which seals dampness against the plywood decking. Over time, this moisture weakens the 1/2 inch OSB or plywood sheets, leading to much more expensive structural repairs. Addressing the issue promptly ensures your roof remains built for the long road.
Do I need to remove the moss before applying a roof patch?
You must remove all moss before applying a patch because the organic growth prevents the sealant from sticking to the shingles. In Oregon, moss can grow 2 inches thick and acts like a sponge that retains water. Use a stiff brush to clear a 6 inch radius around the leak site before you begin. This precision ensures the patch bonds directly to the asphalt, providing the reliability your home requires during a storm.
Can I use a tarp instead of a patch compound?
You can use a heavy-duty 6-mil polyethylene tarp instead of a compound if the damage covers more than 2 square feet. Tarps are effective for covering large sections of missing shingles or damaged ridges where a liquid emergency roof patch might fail. Secure the tarp with 1-by-2 inch wood furring strips to prevent wind uplift. This method offers a dependable shield for your home while you wait for a professional team to arrive.